Working time:Monday - Saturday: 09 AM - 09 PM
+91 9121783960

Find us:F4 1ST FLOOR EurekaCourt Building, Bata Shoroom Lane

3D MAX

Let children creative and make a different

3D MAX

Let children creative and make a different

image not exist
BEST 3D MAX TRAINING INSTITUTE IN HYDERABAD

OVERVIEW OF 3D MAX

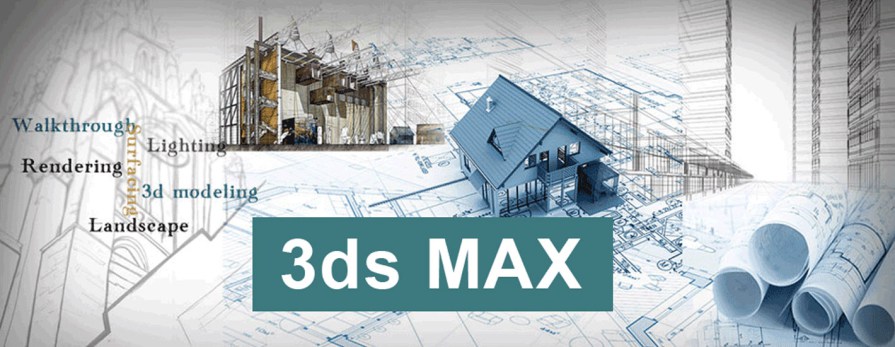
Autodesk® 3ds Max® 2015 helps you get started with tools for 3D modeling, animation, rendering, compositing and pre-production planning. You’ll learn how to apply materials and light scenes, animate cameras and objects, assemble short sequences, and avoid long render times.Best 3ds MAX training institute in Hyderabad

  • Getting Started
    • Learning Objectives
    • Launching 3ds Max Design
    • Configuring 3ds Max and 3ds Max Design
    • Customizing Mouse Interaction
    • Working with Standards
    • Setting Display Units to Architectural
    • Assigning a Project Folder
    • Configuring and Saving Viewport Layouts
    • Creating a Prototype File
    • Configuring the Default UI and Presets
    • Maximizing the Workspace
    • Synchronizing the User Interface and Default Presets
    • Navigating Menu Drop-Downs
    • Working with Toolbars
    • Managing the Ribbon
    • Managing Workspaces
    • Understanding Object Interaction
    • Navigating the Scene Using the ViewCube
    • Accessing the Help System
    • Accessing Autodesks Online Portals
  • Pre-Production and Planning
    • Pre-Planning the Production
    • Developing a Sketch-Style Storyboard
    • Examining a Sample Storyboard
    • Planning Scene Level of Detail
    • Understanding Level of Detail
    • Planning File Output
    • Outputting for Print and Web
    • Reviewing Still Image Types
    • Examining Animation Output
    • Reviewing Animation Output Types
    • Working with Layers
    • Previsualizing a Scene
    • Configuring in Viewport Previsualization with Nitrous
  • Modeling
    • Modeling in 3ds Max
    • Understanding Shapes
    • Working with Spline Shapes
    • Working with Extended Splines
    • Saving Incremental Files
    • Cloning Shapes
    • Creating Outline Shapes
    • Attaching Shapes
    • Editing Closed 2D shapes
    • Trimming and Welding Splines
    • Filleting a Vertex
    • Understanding Mesh and Poly Objects
    • Discovering the Editable Poly Object Type
    • Converting Object Types
    • Utilizing the Snap Tools
    • Learning to Use the Graphite Modeling Tools
    • Working with the Paint Deform Tool
    • Using the Conform Paint Tool
    • Understanding 2D and 3D objects
    • Introducing Compound Objects
    • Working with ProBoolean
    • Using Shapemerge
    • Aligning the Road
    • Exploring More Editable Poly
    • Merging Objects
    • Working with Caddies
    • Modeling Windows
    • Modeling Window Frames
    • Modeling Window Panes
    • Examining Modifiers and the Modifier Stack
    • Learning About Object Space Modifiers
    • Adding a Bevel Profile Modifier
    • Editing 2D Shapes
    • Stacking Modifiers
    • Editing Modifiers
    • Understanding World-Space Modifiers
    • Applying the Map Scalar Modifier
    • Understand Object Painting
    • Painting a Scene
    • Discovering AEC Objects
    • Building with AEC Walls
    • Adding a Door
    • Installing Windows
    • Working with Containers
    • Inheriting Container Contents
    • Modeling - Best Practices
  • Materials
    • Introducing Materials
    • Understanding the Slate Material Editor
    • Creating Schematic Materials
    • Working with the Standard Material
    • Discovering the Arch and Design Material
    • Adjusting Shaders
    • Editing Reflectivity
    • Assigning a Material
    • Using Map Patterns
    • Simulating Geometry
    • Incorporating Displacement Mapping
    • Setting Transparency
    • Calculating Map Sizes
    • Creating a Tile Map
    • Determining Map Coverage
    • Adding a UVW Map Modifier
    • Working with Unwrap UVW
    • Working with Multiple Materials
    • Discovering the Multi/Sub-Object Material
    • Setting Material IDs
    • Editing Material IDs
    • Assigning a Multi/Sub-Object Material
    • Understanding Blend Materials and Masks
    • Using a Blend Material
    • Masking with Materials
    • Understanding Substance Textures
    • Working with Substance Textures
    • Baking Textures - Render to Texture
    • Painting a Texture with Viewport Canvas
    • Working with Vector Graphics
    • Discovering Material Libraries
    • Understanding the Autodesk Materials Library
    • Using an Autodesk Library Material
    • Creating a New Library
  • Lighting
    • Differentiating Standard Lights versus Photometric Lights
    • Understanding Direct and Indirect Light
    • Discovering Daylight
    • Placing a Daylight System
    • Adjusting Location
    • Adjusting the Physical Sky
    • Understanding Photometric Lights
    • Enabling Streetlights in a Scene
    • Changing Photometric Light Presets
    • Understanding Indirect Light
    • Calculating Indirect Illumination
    • Working with Final Gather
    • Setting Final Gather Bounces
    • Working with Sky Portals
    • Discovering Photon Mapping
    • Configuring Interior Night Lighting
    • Using Photometric IES Web Files
    • Enabling Photon Mapping
    • Creating Object Lights
    • Understanding Image-Based Lighting
    • Creating a Simple Image-Based Lighting Setup
    • Rendering Image-Based Lighting with Mental Ray
    • Rendering Image-Based Lighting with iRay
  • Rendering
    • Introducing Rendering
    • Rendering Still Images
    • Understanding Still Image Resolution
    • Rendering Still Images
    • Setting Render Presets
    • Understanding Still Image File Types
    • Choosing Still Image File Types
    • Rendering Animations
    • Understanding Image Resolution for Animations
    • Setting Animation Resolution
    • Understanding Animation File Types
    • Creating a Preview Animation
    • Rendering Sequential Images
    • Using the RAM Player
    • Saving with Animation Codecs
    • Discovering iRay
    • Visualizing Realistic Lighting with iRay
    • Rendering with the Quicksilver Hardware Renderer
    • Editing a Scene Using iRay in ActiveShade
  • Cameras
    • Understanding the Camera
    • Discovering Traditional Camera Shots
    • Identifying Effective Camera Distance
    • Changing Viewer Distance
    • Discovering Depth of Field
    • Adding Depth of Field to Control Focus
    • Understanding Camera Angles
    • Adjusting Camera Angles
    • Discovering Composition Essentials
    • Understanding the Rule of Thirds
    • Implementing the Rule of Thirds
    • Discovering Diagonals
    • Establishing Diagonals
    • Using Camera Clipping Planes
    • Establishing Perspective Match for Compositing
    • Using 2D Pan and Zoom
  • Animation
    • Understanding Animation Concepts
    • Identifying Controllers and Controller Types
    • Discovering Object Animation
    • Exploring Keyframe Animation
    • Keyframing a Moving Object
    • Understanding Path Animation
    • Animating on a Path
    • Understanding Velocity Control
    • Applying an Ease Curve
    • Discovering Camera Animation Basics
    • Separating Camera Position and Rotation Control
    • Animating a Dummy on a Path
    • Linking a Hierarchy
    • Retiming an Animation
    • Simulating a Population
    • Modifying a Population Simulation
    • Applying an Autodesk Material Metal for the Window Frame
  • Lighting Analysis for Presentation
    • Understanding Lighting Analysis for Presentation
    • Using the Lighting Analysis Assistant
    • Incorporating Light Meters
    • Configuring Lighting Analysis Image Overlay
  • Lighting Analysis - Render an Analysis
    • Rendering a Complete Analysis
    • Adjusting Exposure
    • Configuring Final Gather
    • Setting Common Rendering Settings
    • Rendering a Final Image
    • Grabbing a Viewport Image
  • Post-Production
    • Introducing Post-Production
    • Discovering the Concept of Short Scenes
    • Discovering Video Post
    • Using the Video Post Queue
    • Indicating Change of Time or Place
    • Adding a Cross Fade Transition
    • Using Image layers
    • Understanding Scenes Layering
    • Rendering with Passes
    • Discovering Autodesk Composite
    • Compositing Multiple Layers
    • Remapping Color Output
  • Program Interoperability
    • Understanding Program Interoperability
    • Linking versus Importing
    • Linking to an AutoCAD Model
    • Applying Materials to an AutoCAD Model
    • Rendering a Linked AutoCAD Model
    • Linking a Revit Model
    • Rendering a Linked Revit Model
    • Importing an Inventor Assembly
    • Introducing Civil View
    • Initializing Civil View
    • Importing a Civil 3D Model
    • Understanding the Civil View Explorer
    • Placing Road Marking Objects
    • Adding Signs and Vehicles to the Layout
    • Rendering the Civil View Scene
  • Output
    • Considering Final Output
    • Understanding Scene States
    • Setting Up Scene States for Rendering
    • Understanding Batch Rendering
    • Configuring a Batch Rendering Queue
    • Outputting Still Images
    • Understanding Print Resolution
    • Controlling Print Size
    • Exploring Gamma Correction
    • Setting Gamma Correction
    • Creating Special Image Types
    • Discovering the Panorama Exporter
    • Creating a Panorama File
    • Outputting for Cinema
    • Saving Open EXR Files
  • Lighting Analysis
    • Introducing Lighting Analysis
    • Using Lighting Analysis
    • Identifying Lighting Analysis Integration
    • Introducing LEED Certification and 3ds Max
    • Discovering the Lighting Analysis User Interface
    • Working With the Lighting Analysis Assistant
    • Identifying Issues for Lighting Analysis
    • Understanding 3D Lighting Design
  • Lighting Analysis - Lighting the Scene
    • Creating a Ground Plane
    • Discovering the Daylight System
    • Adding a Daylight System
    • Configuring the Daylight System
    • Exploring Skylight Portals
    • Adjusting Exposure Control
  • Lighting Analysis: Scene Materials
    • Understanding Scene Materials
    • Identifying Scene Materials
    • Creating Material for the Ground Plane
    • Adding Beige Wall Paint Material
    • Adjusting the BRDF Function Curve
    • Exploring Window and Frame Materials
    • Using the Multi-Object and SubObject Materials
    • Adding an Autodesk Material Glazing for Windows

NEWSLETTER

Subscribe and get the latest news and useful tips, advice and best offer.